
This guide explains wire ring belt designation for engineers, maintenance teams and industrial buyers. Selection should be based on the current wire ring conveyor belt, its mating conveyor hardware and the duty the machine actually performs. The four checkpoints used here are eyelink pitch, rod pitch, rod diameter and eyelink diameter.
- Eyelink Pitch
- Rod Pitch
- Rod Diameter
- Eyelink Diameter
1. Define what eyelink pitch controls in this conveyor
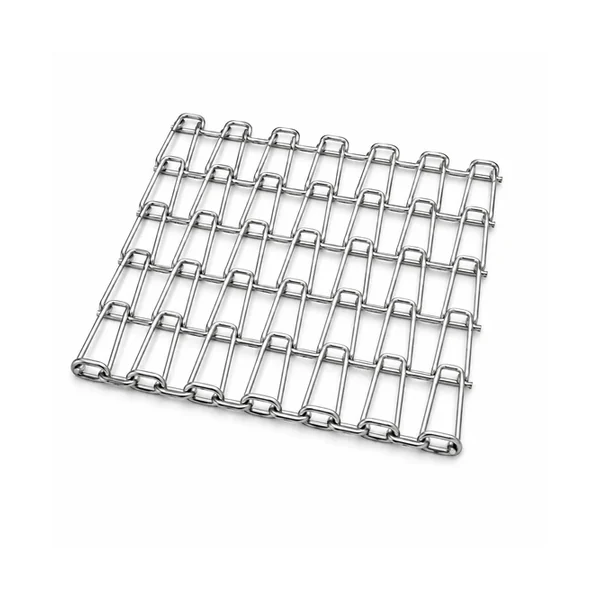
For Wire Ring Belt Designation and Selection Guide, begin with eyelink pitch because it establishes the first mechanical boundary for the wire ring conveyor belt. Record the feature while the component is still installed, then relate it to eyelinks/rings, cross rods, support wire and edges. A dimension has more value when its mating surface and running direction are visible.
Measure more than one repeat when the feature is periodic. On a chain this may mean several pitches; on a wire belt it may mean several rod or mesh repeats. If the part is worn, record the range rather than turning one service-worn measurement into an assumed nominal value. Photograph any polished contact or deformation that indicates how the interface has been carrying load.
2. Measure rod pitch so another engineer can reproduce the result
Rod Pitch should be measured with the same datum and method each time. Note whether the measurement was taken in a straight carrying section, at a curve, at the drive or on a removed bench sample. That context matters because service wear and articulation can change what the measuring tool sees.
For this wire ring conveyor belt, cross-check rod pitch against eyelink pitch and the surrounding eyelinks/rings, cross rods, support wire and edges. If those features disagree with the machine drawing, treat the as-built machine as a separate record and identify the difference before purchasing a replacement. An old part number cannot explain a guide, transfer or sprocket that has been modified.
3. Connect rod diameter to the mating drive, guide and support system
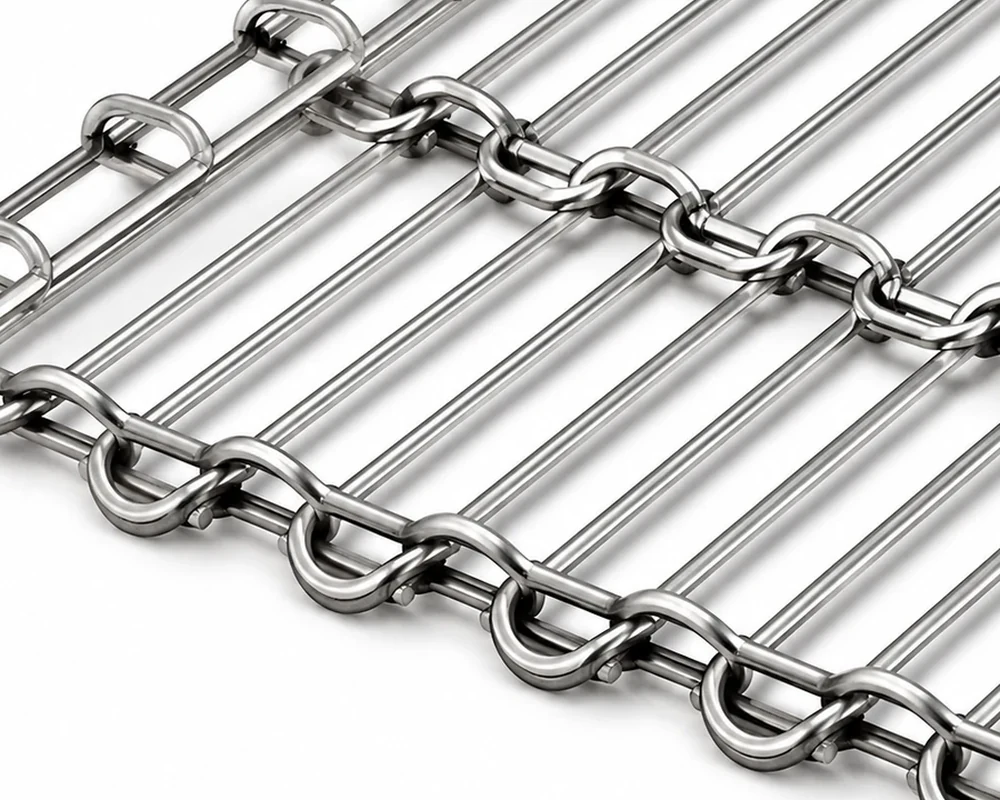
The practical question is not whether rod diameter looks correct on the component; it is whether it matches the current drive, guide and support arrangement. Inspect the entry to the drive, transitions between supports, both conveyor edges and the return path. On a side-flexing chain, include the tightest curve. On a belt, include the transfer and edge guidance.
Look for asymmetric wear. A shiny track on one side, a bent cross rod at a repeating interval or a hook that contacts only one return guide can identify a machine alignment problem. Correcting the interface before fitting the new component prevents the replacement from inheriting the same damage pattern.

4. Treat eyelink diameter as an operating condition, not a guessed rating
Eyelink Diameter should be described together with product size and spacing, line speed, starts and stops, curves or inclines, process zones and sanitation. Those conditions explain how the wire ring conveyor belt is used. They should not be converted into a universal product rating unless the relevant specification actually provides one.
When the process has changed since the last purchase, say so explicitly. A new package size, denser product spacing or altered transfer can change support and clearance requirements even though the original component designation is unchanged. For maintenance troubleshooting, record whether the symptom began before or after that process change.

5. Read wear and motion as evidence for wire ring belt designation
For Wire Ring Belt Designation and Selection Guide, inspect the machine for changes in eye pitch, rod pitch, wire diameter, belt width and drive/support alignment. Mark one joint, carrier or mesh row and follow it through the complete path at low speed. If the symptom follows the marked component everywhere, the component deserves closer inspection. If the symptom appears only at one location, investigate the local guide, sprocket, support or transfer first.
Document wear before cleaning or disassembly removes the evidence. Note where residue accumulates, which side is polished, whether a pin or rod has shifted, and whether the product moves or marks at the same location. This condition record is useful when comparing a new sample because it gives the supplier and maintenance team a common reference.
6. Commission the wire ring conveyor belt in controlled steps
Before installation, clean the conveyor and inspect the mating parts. Check sprocket teeth, guide edges, supports, transfer plates, shafts and return rollers for damage or steps. Install without forcing the component sideways or using take-up to hide a dimensional conflict. Where manual rotation is practical, move the system through the critical interface before applying power.
Run empty at the lowest practical speed and observe the complete loop. Then introduce representative product spacing and repeat the observation. For wire ring belt designation, pay special attention to eyelink pitch, rod pitch, rod diameter and eyelink diameter. Record the accepted guide or take-up condition so later service inspections can compare against a known baseline.
7. Include cleaning and inspection access in the mechanical decision
Food conveyors must remain inspectable after routine cleaning. For the wire ring conveyor belt, identify joints, wire intersections, carrier recesses, hook interfaces or guide channels where product residue can remain. Cleaning should remove residue without levering plates, bending wire or changing guide alignment. The required cleaning method must also be compatible with the specified component and the non-metallic parts around it.
After cleaning, inspect the same mechanical checkpoints used during commissioning. A stiff joint, displaced guide, deformed edge or changed hook position can be easier to see after residue is removed. If lubrication is used, record the actual system rather than assuming one method applies to every food conveyor.

8. Convert the inspection into a concise RFQ
| RFQ block | Information for wire ring belt designation |
|---|---|
| Eyelink Pitch | Measure and photograph eyelink pitch with its machine datum. |
| Rod Pitch | Record rod pitch over enough repeats to reveal wear or variation. |
| Rod Diameter | Show how rod diameter mates with the drive, guide, carrier or support. |
| Eyelink Diameter | Describe eyelink diameter together with product, speed, process and sanitation. |
| Commercial plan | State sample quantity, production quantity by model, and any mandatory material or process requirement. |
Keep each model on its own technical line even when several lines are combined commercially. Label photographs and samples to the same line item. If a dimension comes from a worn part, say so; if a material grade is mandatory, state the requirement; if a rating is unknown, leave it as a review question.
9. Common mistakes when working on wire ring belt designation
Two components can share a similar silhouette while using different pitch, width, attachment, edge or drive geometry.
A single service-worn joint or mesh opening can hide elongation or deformation. Use multiple repeats where possible.
Damaged guides, sprockets, supports or transfers can reproduce the same failure on a new component.
Operating conditions explain the application; they do not change what was actually measured on the component.
10. Frequently asked questions about wire ring belt designation
What is the first check for wire ring belt designation?
Start with eyelink pitch and photograph how it relates to the current wire ring conveyor belt interface.
Why should rod pitch be measured over several repeats?
Multiple repeats make service wear or local deformation easier to distinguish from the intended geometry.
How does rod diameter affect the decision?
It must be checked against the mating drive, guide, support or product-carrying interface rather than considered in isolation.
What should be stated about eyelink diameter?
Describe it as an operating condition together with product, speed, process exposure and sanitation.
When is a sample helpful?
A short sample is useful when the geometry is difficult to capture reliably in photographs or when the original designation is missing.
11. A four-step selection workflow for Wire Ring Belt Designation and Selection Guide
Step 1 — Identify: define the wire ring conveyor belt and machine position, then confirm running direction. Step 2 — Measure: record eyelink pitch and rod pitch using repeatable datums. Step 3 — Interface: verify rod diameter against the current drive, guide, support and transfer arrangement. Step 4 — Duty: describe eyelink diameter and the operating conditions that can affect product handling and maintenance.
If the four steps point to one configuration, define sample or first-article acceptance dimensions before production quantity. If they conflict, resolve the machine interface before changing the component specification. A small controlled trial is more informative than forcing a component to fit and then troubleshooting the consequences at production speed.
12. Build a repeat-order record for wire ring belt designation
Keep the accepted designation, critical dimensions, current machine photographs, commissioning result and the machine position together. When maintenance finds new wear, add photographs at the same locations. When the machine is modified, update the interface record at the same time. This makes the next replacement enquiry a comparison against an accepted baseline rather than a new identification exercise.
For related information, see the food conveyor product range, the chain selection guide and the RFQ checklist. When you are ready to quote, use the form at the bottom of this page.
13. Engineering notes specific to Wire Ring Belt Designation and Selection Guide
Do not treat eyelink pitch, rod pitch, rod diameter and eyelink diameter as four independent checklist boxes. They interact through the machine. A change in one measured feature can alter guide clearance, drive engagement or product position elsewhere in the loop. For that reason, photographs should show both the component and the surrounding conveyor hardware, with a scale or known reference where practical.
When a replacement has to be produced before an unworn original is available, distinguish what is known from what is estimated. Use the current drawing, several measured repeats and machine datums to narrow the geometry. If uncertainty remains around an interface that is difficult to adjust on the machine, make that interface part of sample approval. For wire ring belt designation, this is safer than compensating during installation with guide movement or excessive take-up.
Maintenance teams can improve future purchasing by keeping one removed but identifiable sample after a successful replacement. Mark running direction and the equipment position. The sample does not replace a drawing, but it can confirm formed features, edge details and articulation that are hard to describe in an email. Pair it with the latest dimensional record rather than an undocumented historical sample.
Finally, define who owns the acceptance decision. Purchasing can confirm quantity and commercial requirements; maintenance can confirm machine condition; engineering can approve the geometry and any changed interface. Bringing those observations together before production release reduces the risk that one department assumes another has already checked rod diameter or the surrounding conveyor path.
14. Field worksheet for wire ring belt designation
Use one worksheet for the machine and keep it with the accepted component record. Start with a line for eyelink pitch: write the measured value or observed configuration, the measurement datum, and whether the feature is unworn, worn or estimated from a drawing. Add a second line for rod pitch and record enough repeats to show variation rather than a single isolated number. This gives the supplier a traceable basis for comparison without pretending that service wear is a nominal dimension.
The next block should describe rod diameter at the mating conveyor. Photograph the drive, guide, support or transfer that controls this feature and include a scale where possible. If the machine has been modified, label the modification. A useful photograph should answer where the part sits, which way it moves, what supports it and which fixed surfaces limit clearance.
Keep eyelink diameter in an operating-duty block. Record the product, spacing, speed, starts and stops, curve or incline, process zone and sanitation method that are relevant to Wire Ring Belt Designation and Selection Guide. If the current component has a recurring symptom, add when it appears: continuously, once per revolution, only under product load, only after cleaning, or only at one machine position. The timing often directs the next mechanical inspection.
Before commissioning, define the acceptance check. Decide which dimensions will be measured on receipt, which visible features must match the approved configuration and what low-speed test will be used. During the test, use a marked joint, hook, carrier or mesh row and follow it through the complete path. Record any contact, lift, skew, noise or product-position change and the machine location where it occurs.
After acceptance, keep the worksheet, approved photographs and any sample reference with the purchase record. The next enquiry can then compare the current conveyor with the accepted baseline instead of starting from memory. If the machine, product format or cleaning process changes, update the worksheet at the same time so future replacements are checked against the machine that actually exists.
15. Record the approved setup for Wire Ring Belt Designation and Selection Guide
When the technical comparison is finished, summarize the decision in a short technical record. State the selected component or configuration, the machine position, the dimensions that were checked, the operating conditions used for the review and any point that still requires confirmation during sample testing. This prevents a later buyer or maintenance technician from seeing only a part number without the context that made it acceptable.
Keep changes visible. If a guide is moved, a sprocket is replaced, the product spacing changes or a transfer is rebuilt, update the technical record. For wire ring belt designation, the most reliable repeat order is one that can be compared with the same machine datums and commissioning observations used the first time.